caramel cake

caramel cake

This month the Daring Bakers made a Caramel Cake with Caramelized Butter Frosting courtesy of Shuna Fish Lydon, as published on Bay Area Bites. Dolores of culinary curiosity and Alex (Brownie of the Blondie and Brownie duo), Jenny of Foray into Food were our hosts.

I made my cake on the Wednesday before Thanksgiving for a little pre-holiday potluck and it turned out pretty well, perfectly serviceable, but not amazing. I would probably revisit my adaptations before making it again – the texture was just a little too funky. Still, I did love the caramel flavors, so I might come back to this challenge and rework it.

Sadly, when I left the party, I discovered that my car had been broken into. Nothing was taken, but the passenger side window was smashed, which means that I’m out $200.  With the hub-bub of Thanksgiving, and trying to get the glass replaced, the cake and this post were completely forgotten. It is still hanging out in the brown paper bag which I never unpacked, and is probably as stale as a rock… and I am a day late in getting this out.

CARAMEL CAKE WITH CARAMELIZED BUTTER FROSTING

10 Tablespoons unsalted butter at room temperature
1 1/4 Cups granulated sugar
1/2 teaspoon kosher salt
1/3 Cup Caramel Syrup (see recipe below)
2 eggs, at room temperature
splash vanilla extract
1 cup tapioca starch
1/2 cup sorghum flour
1/2 cup rice flour
1 1/2 teaspoons xanthan gum
1 teaspoon baking powder
1 cup milk, at room temperature

Preheat oven to 350F

Butter one tall (2 – 2.5 inch deep) 9-inch cake pan.

In the bowl of a stand mixer fitted with a paddle attachment, cream butter until smooth. Add sugar and salt & cream until light and fluffy.

Slowly pour room temperature caramel syrup into bowl. Scrape down bowl and increase speed. Add eggs/vanilla extract a little at a time, mixing well after each addition. Scrape down bowl again, beat mixture until light and uniform.

Sift flour and baking powder.

Turn mixer to lowest speed, and add one third of the dry ingredients. When incorporated, add half of the milk, a little at a time. Add another third of the dry ingredients, then the other half of the milk and finish with the dry ingredients. {This is called the dry, wet, dry, wet, dry method in cake making. It is often employed when there is a high proportion of liquid in the batter.}

Take off mixer and by hand, use a spatula to do a few last folds, making sure batter is uniform. Turn batter into prepared cake pan.

Place cake pan on cookie sheet or 1/2 sheet pan. Set first timer for 30 minutes, rotate pan and set timer for another 15-20 minutes. Your own oven will set the pace. Bake until sides pull away from the pan and skewer inserted in middle comes out clean. Cool cake completely before icing it.

Cake will keep for three days outside of the refrigerator.

CARAMEL SYRUP

2 cups sugar
1/2 cup water
1 cup water (for “stopping” the caramelization process)
In a small stainless steel saucepan, with tall sides, mix water and sugar until mixture feels like wet sand. Brush down any stray sugar crystals with wet pastry brush. Turn on heat to highest flame. Cook until smoking slightly: dark amber.

When color is achieved, very carefully pour in one cup of water. Caramel will jump and sputter about! It is very dangerous, so have long sleeves on and be prepared to step back.

Whisk over medium heat until it has reduced slightly and feels sticky between two fingers. {Obviously wait for it to cool on a spoon before touching it.}

Note: For safety reasons, have ready a bowl of ice water to plunge your hands into if any caramel should land on your skin.

CARAMELIZED BUTTER FROSTING

12 tablespoons unsalted butter
1 pound confectioner’s sugar, sifted
4-6 tablespoons heavy cream
2 teaspoons vanilla extract
2-4 tablespoons caramel syrup
Kosher or sea salt to taste

Cook butter until brown. Pour through a fine meshed sieve into a heatproof bowl, set aside to cool.

Pour cooled brown butter into mixer bowl.

In a stand mixer fitted with a paddle or whisk attachment, add confectioner’s sugar a little at a time. When mixture looks too chunky to take any more, add a bit of cream and or caramel syrup. Repeat until mixture looks smooth and all confectioner’s sugar has been incorporated. Add salt to taste.

Note: Caramelized butter frosting will keep in fridge for up to a month.
To smooth out from cold, microwave a bit, then mix with paddle attachment until smooth and light

I can’t believe it has been a month since I last posted. Where have I been? Well, I’ve been studying for, stressing about, and taking my “preliminary PhD exams.” Basically, once I pass them, I will get to start writing my dissertation. Last weekend I took the written portion. I had 72 hours to answer 3 questions for a total of 30+ pages. Mine ended up at 33. I haven’t wanted to touch my computer, or write since. Even though I managed to sleep almost a full eight hours every night (okay the last night I only slept 6), even though I slipped out for yoga around noon on Saturday, the test was excruciating. I had no appetite, my shoulders and back hurt badly, and worst, by halfway through the second day I was exhausted mentally. Try writing ten pages when you are so tired you can’t put together coherent sentences. Not pretty.

Hopefully though, I will pass. A week from Monday I take the oral portion. That part only last two hours. I’m sure it will be challenging and intense, but I think I am ready. I am definitely ready for this to be over.

So, only the Daring Bakers could draw me back into the blogosphere in the middle of this test. But I am glad that they did. This month we made lavash, an Armenian flatbread. Better yet, the recipe was already gluten-free and vegan. We could top the crackers with whatever we wanted, as long as it was vegan. I made hummus for my Lavash. Yum. Thanks Natalie and Shel for a great challenge!

Recipes after the jump!

I know I haven’t been around much lately. In just over a month, my life will start to shift back to normal. Until then, I don’t know how many posts I’ll manage to get up. But, I couldn’t let another month go by without a Daring Bakers’ post. This month the Daring Bakers made eclairs, and my gluten-free version turned out fabulous. The day that I made them, I had no sweet tooth, and no desire to bake. I also, wasn’t really craving chocolate, so I decided to go with a more classic cream filling. Luckily the next day, my sweet tooth came back, and within a few days all the eclairs had vanished from my freezer. I’m almost tempted to make more.

To make the dough gluten-free, I used a combination of gluten-free flours, added xanthan gum, and just a touch of baking powder. I’m not sure the baking powder was entirely necessary, but I did get a nice rise. I also decided not to prop open my oven door while baking.

Oh, and this month’s challenge was hosted by Tony Tahhan and Meetak.
Without further ado, here is the recipe:

Recipe after the Jump!

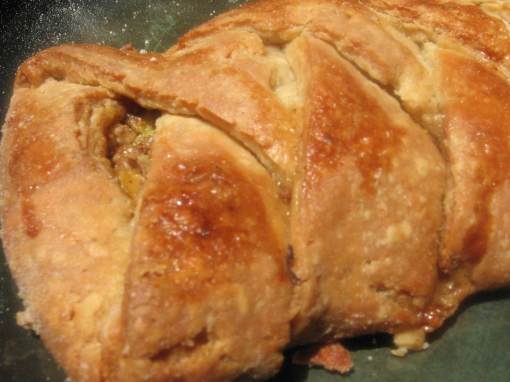
This month’s Daring Baker’s challenge, hosted by Kelly of Sass and Veracity, and Ben of What’s Cookin’ was to make a braided Danish. The second I saw the challenge, I started sweating bullets. This seems to be a theme for me with Daring Bakers. I had no idea how gluten-free flours would behave in a laminated dough, and I planned for failure. Actually, I planned for multiple failures, going so far as to find an alternate recipe in case I really struggled. Surprisingly though, my braid came off without a hitch. I tried sharing my technique, but other gluten-free bakers using similar flours struggled (nobody used the exact same combination). Over the course of the month, it became clear that part of the problem was the way gluten-free doughs behave in the fridge. Sweet rice flour (also known as gelatinous rice flour) holds up to refrigeration better than most, but refrigerating a dough overnight or for five hours, might not be the best plan. Several other gluten-free bloggers had success cutting the fridge time down to 10 minutes between turns and 30 minutes in the freezer before the final shaping. I think these times sound a little quick… the butter needs a chance to harden again or you will lose the flakiness. If I did it again, I would still let the dough rest 30 minutes between turns. But I would definitely cut the final fridge time down from five hours to something more like one or two (or use the freezer for 30). I have changed the directions to reflect these changes.

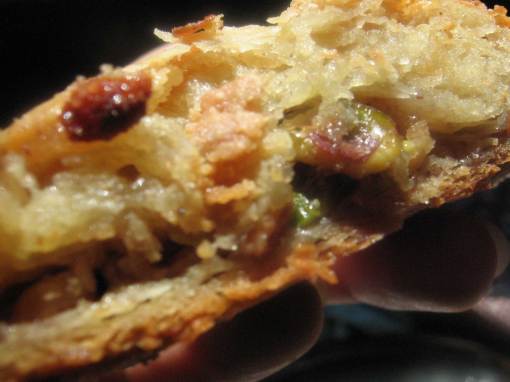
For the record, I would definitely make these danishes again. In fact, I meant to, all month. But, I’m trying to look good in a bathing suit this summer, and I devoured my entire braid in less than 24 hours, with minimal sharing. Needless to say, a repeat performance was not going to help my waistline. Still, my braid was flaky and flavorful. I loved the flavor of cardamom and orange in the pastry and the simplicity of the cinnamon-sugar and walnut filling. I will play more with the filling next time, but sometimes combinations are classic for a reason.

You can almost see the flakiness in this picture:

Recipe after the Jump

This cake almost killed me. Or, at least, the buttercream almost did. I’m not sure I’ve ever had a more frustrating sojourn in the kitchen, and I definitely have new respect for the “daring” portion of the name “daring bakers.” Of course, it was largely my fault. For the record, you absolutely cannot use salted butter in buttercream frosting. Also, it is not a good ideas to add a sugar syrup that has crystallized, unless you want chunks of sugar in your buttercream. If you use a crystallized sugar syrup and salted butter together, I guarantee you, you will be dumping your buttercream down the drain.

Which explains why there had to be a second attempt at the buttercream. On the second attempt, I decided to throw caution to the wind, and make a honey syrup instead of a sugar syrup (it was actually part honey, part sugar), but it wouldn’t get up to 225 degrees. I used it anyway. I ended up with liquid buttercream. Apparently, if I had stuck part of the frosting in the freezer and the rest in the fridge and tried beating again, I might have been able to rescue it. I didn’t know that at the time, down the drain it went.

Which explains why there was a third attempt at buttercream, with my last two sticks of butter. I almost followed the recipe the third time. But, I cut down the sugar, so there would be room for the sweetness of the honey. After some frantic whipping, and a moment of panic when this buttercream too seemed headed for soup, the buttercream pulled together beautiful. Still, exhausted and cranky, I vowed I would never make an Italian buttercream again.

Until, I tasted this cake. It was wonderful, restaurant-worthy, wedding-cake-worthy, cure me of my baklava cravings-worthy. I had worried that the cake would be too sweet, with honey flavoring so many layers. I had also worried that the pistachio flavor wouldn’t come through. But mostly, I worried that the entire cake would end up in the trash, inedible. But instead, I couldn’t have been happier with the results. I would make this cake again, and not change anything. Each layer of this cake really does sound a distinctive note, and they blend together in beautiful harmony. The joconde is light and airy, with a hint of cardamom and a strong pistachio flavor. The buttercream is creamy, and tastes of honey, but the flavor is muted, almost subtle. The syrup adds hints of lemon and cinnamon and a rich jolt of honey that plays off the mellowness of the buttercream. With a rich taste of pistachio and a creamy decadent texture, the mousse was my favorite layer, and would make an excellent dessert by itself. Finally,the glaze, which I almost couldn’t bring myself to add, cuts the richness of the mousse, picks up the lemon notes of the syrup and gives the cake balance.

I know this recipe looks intimidating. But if you want an adventure in the kitchen, and a rich reward at the end, give it a try. This was my first Daring Bakers’ challenge, and I look forward to many more

Recipe after the jump